
Before You Start
Twenty years of watching boxes bottom out on conveyor belts taught me one thing: tape failure isn’t random. It’s a matching problem. Here’s what you need before you touch a roll.
- Skill level: Beginner-friendly — if you can run a tape gun, you can follow this. No packaging engineering degree required.
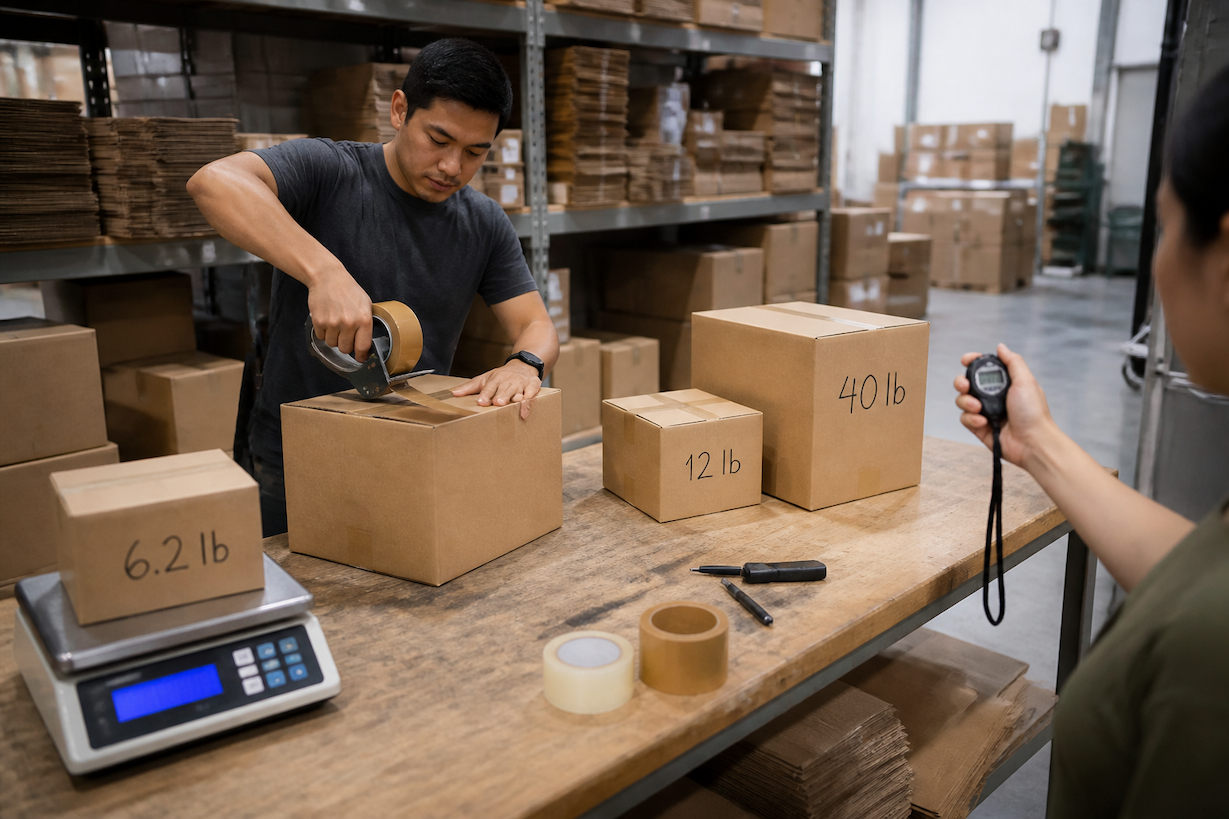
- A kitchen or postal scale to actually weigh a few boxes instead of guessing at their class.
- At least two tape types on hand — a standard hot melt roll and an acrylic or reinforced roll — so you can compare adhesion side by side.
- A tape gun with adjustable tension, not just a hand-held dispenser. Pressure control matters more than people think.
- 5-10 boxes you already ship, ideally spanning your lightest and heaviest SKUs.
- Ten minutes for a drop test — you’ll want a clear floor space and a box you don’t mind sacrificing.
By the end, you’ll walk away knowing exactly which mil thickness and adhesive type belongs on which weight class of box, how to apply an H-taping pattern that actually reinforces seams (not just seals them), and how to run a five-minute drop test that tells you if a seal will survive a truck ride before a customer ever opens the box. No more guessing at the tape aisle — whether that’s at a big box store, a hardware chain, or a bulk supplier.
Twenty years in this business and I can still tell you the exact sound a bad seal makes when a box hits the truck floor — that soft pop, then the slow slide of contents onto pavement. That’s tape failure, and it costs sellers more in refunds and one-star reviews than they’d ever save buying the cheap stuff.
Here’s what most people miss: packing tape isn’t one product. A roll built for a 10-lb apparel mailer has no business sealing a 45-lb box of ceramics, and vice versa. Grab whatever’s cheapest off a shelf at a big-box store, and you’re gambling with every shipment that leaves your packing station. The adhesive, the mil thickness, even how you apply it — all of that has to match the weight class of the box in front of you.
So before you order another case, let’s get the pairing right.
What You’ll Learn and What You Need Before You Start
A seller ships 40 boxes a week, uses whatever roll sits on the shelf, and by Friday three packages have popped open in transit with the tape peeling clean off the flaps. That’s not bad luck — it’s a mismatch between box weight and tape grade. This section shows you how to test your current tape, figure out what your box loads actually demand, and gather what you need before touching a single carton.
The Real Cost of Using the Wrong Tape
Weak or worn-out tape isn’t a minor annoyance. It causes bottomed-out boxes, refund requests, and one-star reviews that hurt your store’s rating for months. A single failed shipment can cost more than a full case of proper packers tape would’ve cost you upfront.
Tools and Supplies to Gather First
Before you start, grab a scale, a tape gun, your heaviest and lightest boxes, and a notepad. If you’re shipping regularly, look into bulk tape options so you’re not stuck mid-week with an empty roll and orders piling up.
Step 1: Sort Your Boxes Into Weight Classes Before You Buy Tape
Most tape failures happen because sellers grab whatever roll is closest, not because the tape itself is bad. Before you even open a catalog of packaging tapes, sort your outgoing boxes into three rough weight classes. It takes five minutes and saves you from returns, split seams, and angry buyer messages later.
Light Class (Under 20 Lbs) — Books, Apparel, Small Parts
Books, folded shirts — small parts don’t need heavy adhesive. A standard 1.6-mil tape holds fine here — no need to overspend.
Heavy Class (20-65 Lbs) — Standard Corrugated Shipments
This is where most Etsy and eBay sellers live.
Standard corrugated shipments in this range need 2.0-mil hot melt tape at minimum, applied in a full H-pattern across every seam.
Extra-Heavy Class (65+ Lbs) — Double-Wall and Bulk Orders
Double-wall boxes shipping bulk orders demand reinforced, or water-activated tape — plain packing tape just isn’t built for that load. Get this wrong — how tape choice affects shipped-product safety becomes obvious fast — usually on your customer’s doorstep.
Step 2: Read the Mil Thickness and Adhesive Type Before Matching Tape to a Box
Ever flip a roll over and actually check the label before tossing it in your cart? Most sellers grab whatever’s cheapest, then wonder why boxes pop open in transit. The mil rating and adhesive type printed on that roll tell you more than the brand name ever will. If you’re stocking up on packing tape for shipping, check those two specs first — everything else is secondary.
Hot Melt vs Acrylic Adhesive — Which Holds Longer in Storage
Hot melt adhesive grabs fast and holds strong right out of the gate — great for same-day shipping. But it can soften in hot trucks or storage units. Acrylic adhesive builds a slower bond, though it resists UV and temperature swings better over weeks of sitting on a shelf.
Why 1.6 Mil Isn’t the Same as 2.6 Mil
A 1.6 mil roll is fine for light mailers under 5 lbs. Anything heavier needs 2.6 mil or thicker — thinner tape splits at the seams under stress. Check our packing and shipping tape guide before buying in bulk.
Step 3: Apply the H-Taping Method for Each Weight Class
Roughly 65% of box failures happen at the seams, not the flaps — that’s the number that convinced us to make the H-pattern standard practice years ago. Run one strip down the center seam, then one strip across each flap edge, forming an “H” shape. For lightweight boxes under 20 lbs, one pass per seam works fine. For anything heavier, you need a second layer. Don’t skip the bottom seam either — that’s where most gravity-related blowouts start when a box gets stacked or tossed onto a conveyor.
Reinforcing Seams on Heavier Loads With a Second Strip
Once you’re past 30 lbs, a single strip of shipping packing tape just won’t hold under repeated handling. Add a perpendicular second strip across the center seam — this cross-hatch resists both flap-lift and edge tearing. Think of it like reinforcing a seam on a jacket: one line of stitching rips, two holds.
Tape Gun Pressure Settings That Prevent Lifting Edges
Too little pressure and edges curl within days. Too much and you’ll shred the tape before it even seals. Set your gun’s tension wheel so the tape lays flat with a slight give — no bubbles, no puckering.
Step 4: Test Your Seal Before It Ever Hits a Truck
Here’s the myth: if tape looks stuck down, it’s stuck down.
Wrong. A seal can look perfect on the shelf and still pop open the second a conveyor belt bumps it. The only real way to know is testing before the box leaves your packing station — not after a customer emails you a photo of a busted flap.
The Drop Test You Can Run in Your Own Packing Station
Tape the box like you normally would, then drop it flat from about waist height onto a hard floor three times. Check the seams and center seal. If the flap lifts even a little — your packing tape isn’t matched to that box’s weight. Heavier boxes need wider tape and more overlap, not just more pressure from the dispenser.
Warning Signs Your Tape Will Fail in Transit
Watch for edges that curl within an hour, tape that stretches instead of gripping, or adhesive that looks shiny and slick rather than tacky. Any of these mean it’s time to start picking the right packaging tape for your actual box weight, not just whatever roll’s closest to the dispenser.
Step 5: Source the Right Packers Tape Without Overpaying or Guessing
Picture this: it’s Sunday night, you’ve got 40 boxes to seal before Monday’s pickup, and the only tape in the house is a half-dry roll from a junk drawer. You run out to grab something — anything — and end up standing in the aisle comparing rolls with no idea which one actually holds. That scramble is exactly why sourcing tape ahead of time matters more than most sellers admit.
Comparing Bulk Rolls vs Small Multi-Packs From General Retailers
Small multi-packs work fine for occasional shippers — if you’re moving dozens of packages a week, bulk rolls save real money per linear foot. A case of 2-mil, 2.83-mil, or thicker rolls — like what’s on the lux tape product page — costs less per box sealed than buying six-packs repeatedly. Do the math on cost-per-seal, not cost-per-roll.
What to Skip When You’re Tempted to Grab Cheap Rolls Off a Shelf
Skip thin, bargain-bin tape with weak hot melt adhesive.
It splits under pressure, fails in heat, and costs you more in returns than it ever saved.
Recap & Next Steps
Here’s the short version: sort boxes by weight class first, then match mil thickness — adhesive type to that class, apply an H-taping pattern, and test the seal before it ever leaves your packing station. Skip any of those steps, and you’re gambling on a seam letting go mid-transit.
What you should do next:
- Audit your current tape stock. Pull every roll you’ve got on hand right now and check the mil rating against the box weights you actually ship — most sellers find they’re using one tape for everything, which is exactly the habit that causes blowouts.
- Run the drop test on your top 3 SKUs. Pick your three most-shipped box sizes and drop-test them this week. If any seam pops, that’s your sign to bump up mil thickness or switch to reinforced tape.
- Set a reorder rule tied to weight class, not brand. Instead of just grabbing whatever’s cheapest off the shelf, keep at least two grades in stock — a standard 1.6-2.0 mil for light packages and a heavier 2.6+ mil or reinforced roll for anything over 20 lbs.
- Pair this with proper box selection. Tape can’t save a box that’s the wrong strength for its contents — if you haven’t already, review how ECT ratings match up with your product weights so the tape and the box are working together, not one compensating for the other.
Get this system locked in once, and you’ll stop thinking about tape failures altogether. That’s the goal — packaging that just works, shipment after shipment.
Tape failure isn’t random — it’s a match-up problem. A box rated for 65 pounds needs a different adhesive load and mil thickness than a five-pound mailer stuffed with socks, and once a seller starts sorting by weight class instead of grabbing whatever roll is closest to the tape gun, split seams and popped bottoms mostly disappear. The H-taping method matters here, but so does pressure: a gun set too loose leaves lifting edges that look fine on day one and fail by day three in a hot delivery truck. Run the drop test before boxes ever leave the packing station. It costs nothing but a few minutes, and it catches weak seals before a customer does.
Sellers shipping dozens of packages a week don’t have room for guesswork on something this basic. Buy packing tape rated for your heaviest common box, not your lightest, and keep a second grade on hand for reinforced seams. Check your current rolls against the mil thickness they’re rated for right now — before the next order goes out the door.



Recent Comments